Quickly Learn Linux – Databases and MySQL
Quick Overview on Databases and MySQL
This post focuses on MySQL installation and configuration. So you can deploy and configure a stand alone instance with this quick guide or continue on and use this database with the MediaWiki deployment. This is a good guide as an introduction to Linux systems and the command line. This is not meant for professionals or experienced admins but more for people looking to start dipping their toes into system administration and engineering.
MySQL is a popular choice for a Relational DataBase Management System. A Database is simply a way to store data and access that data in a quick and easy manner. For an RDBMS the relational part of it refers to the structure of this type of database, tables relate to other tables by relationships between columns/keys/fields. MySQL itself comes in a few different flavors. MariaDB is becoming the more official open source branch, Postgres, Microsoft SQL Server, Oracle SQL (different than MySQL), and even Microsoft Access.
Although lots of people are using other popular database types, like document and wide column databases, many people and companies still choose to use a plain old RDBMS. You will find MySQL and its variants widely used across many large organizations as well as many open source projects. So without further ado, let’s get started with the guide.
Guide Summary
We will install and setup a basic configuration. I like to explain some lower level details where I see confusion from jr members I’ve worked with. If there’s anything you feel I’ve missed or I could add please let me know.
- Setup Yum Repository
- Install MySQL Packages
- Configure Server
- Start and check MySQL
- Connect to MySQL
- Management/Administration
- Backup and Restoration
Step by Step with Details
We will be building off of our Virtualbox deployment, you can continue from that post or follow this on any CentOS/RHEL 7 server installation. I like to stick with MySQL, even though most Linux distributions have switched to MariaDB. I still use it due to habit and you could alternatively use MariaDB if you would like to. Regardless I recommend using a different upstream repository than what is provided by CentOS/RHEL so you can get a more recent version than what is currently provided by RHEL which is version 5.5.
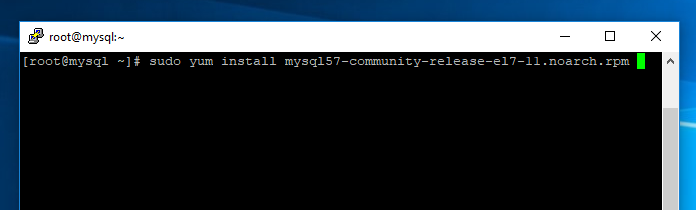
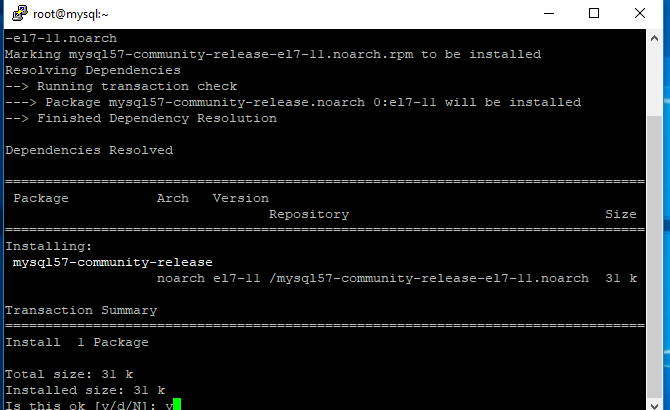
Setup Yum Repository
In the following screenshots I show adding a yum repository. Yum is the package manager on RHEL and a few other distributions of linux (apt being the other popular package manager you may run into). You can update the yum repositories you have by checking the .repo files in /etc/yum.repos.d/. Though Yum is being removed for an updated package manager, the concepts are the same so make sure to read more about Yum.

Now that you’ve added the repo, you should check it out. The repo files are in /etc/yum.repos.d/
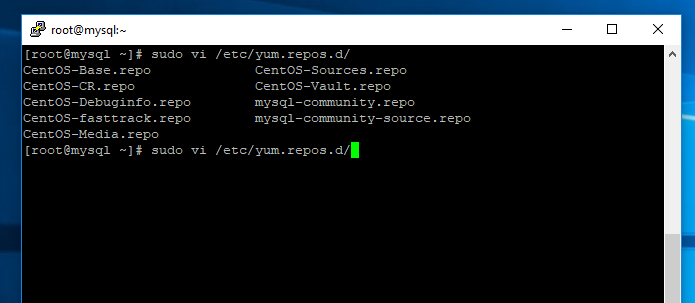
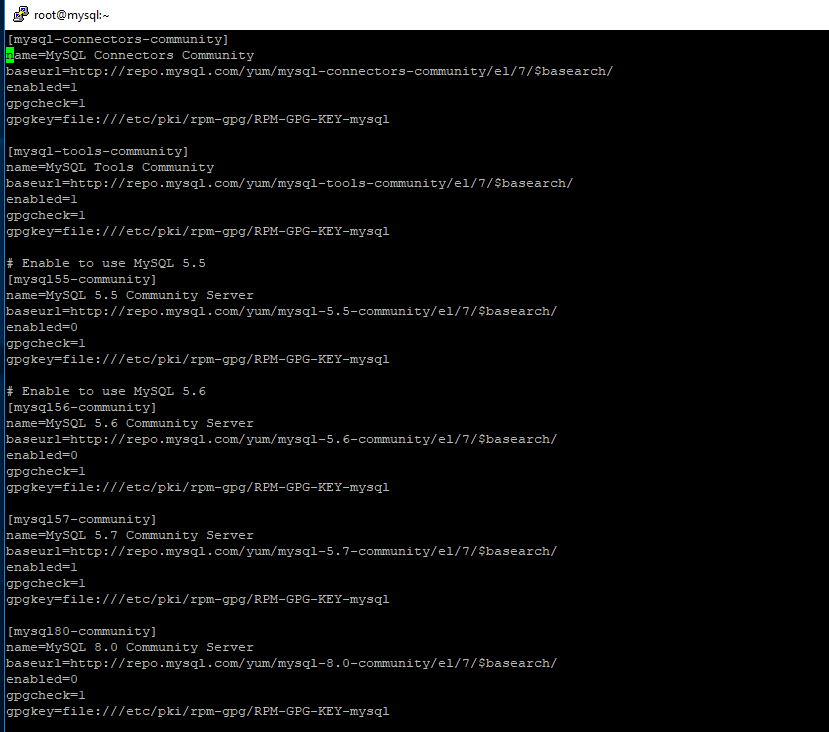
You can see we have MySQL 5.7 community yum repository enabled. It’s always important to gpg check packages, don’t disable this unless you have a very good reason. I do wish the repos defaulted to https instead of http, but we’ll go with what’s there for now.
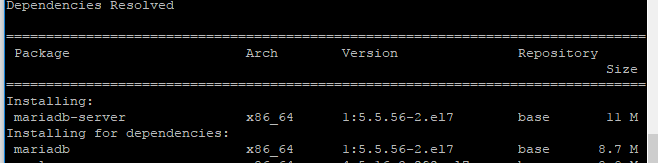
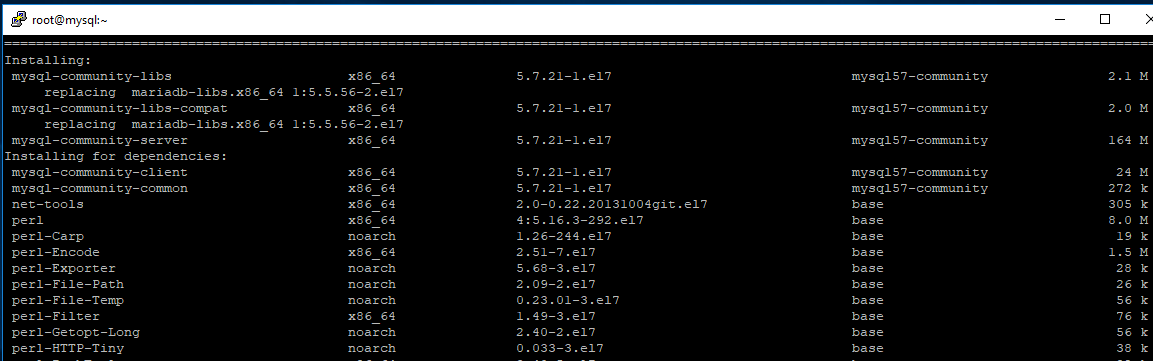
Install MySQL Packages
After I add the yum repo I install the MySQL database package. I see a lot of confusion from newer people about the difference between mysql and mysql-server; mysql is the client side application and mysql-server is the server side application. The server will run as an application listening on a tcp port for client connections. You can run mysql-server yourself or preferably run it as a service, which will run mysql-server under the mysql or other configured user.
Configure Server
The server comes with default configurations which can be overridden with my.cnf files. I always review the mysql documentation on the my.cnf, but MySQL provides you with a default to get started. Check out /etc/my.cnf for your default my.cnf. The data-dir is where your data files and dictionary files will be stored. In newer versions innodb is set to have a file per table, which will also store files in the data-dir.
Start and check MySQL
I can now start MySQL with systemctl and verify that mysql-server is running (mysqld service name). Checking my processes I can see that the mysql user is running mysql-server and I can see the configuration file used. With a new install you will need to get the root password from the mysql log which defaults to /var/log/mysqld.log. Finally, before moving on, make sure to run mysql_secure_installation to complete your installation.
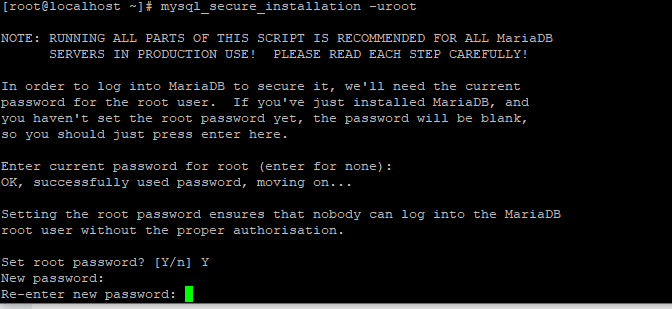
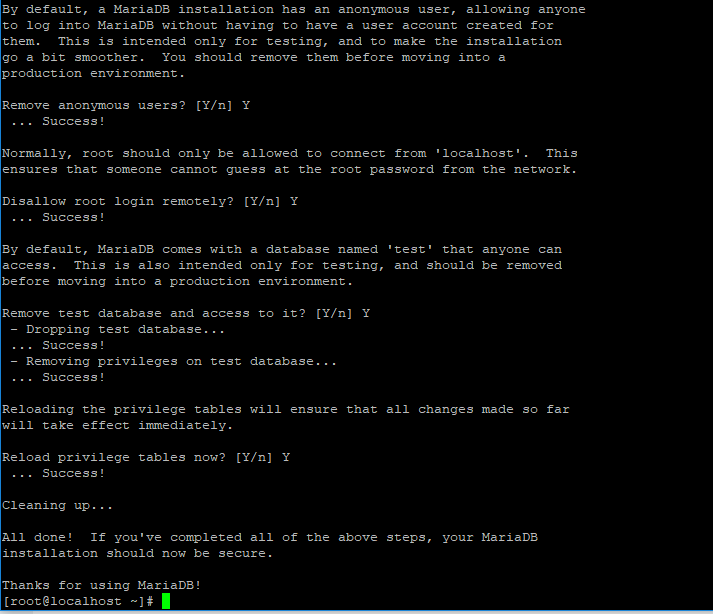
Secure install locks down the install. Root remote access is removed, test database is removed, and root password is updated.
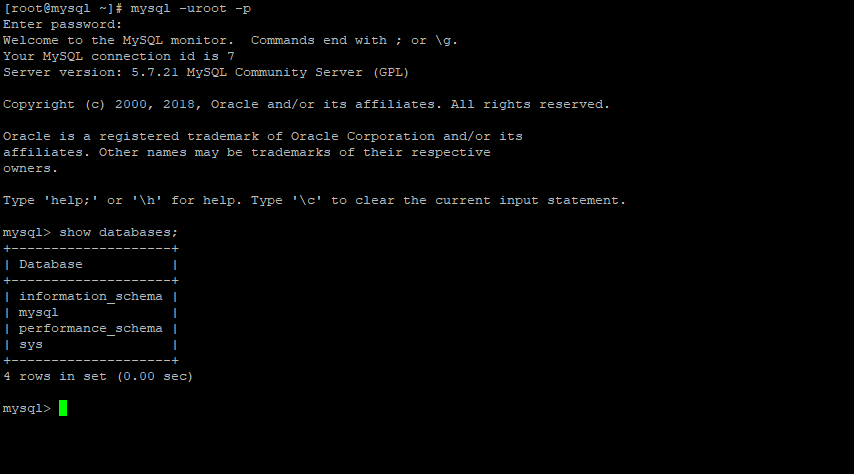
Connect to MySQL
Remember that mysql client side application I was talking about earlier? Well, now we’re going to use it! If your database is configured properly you should now be able to connect to it as the root user. Now when I mention the root user you need to be aware that I’m talking about the MySQL application’s root user, not the Linux root system account.
Management/Administration
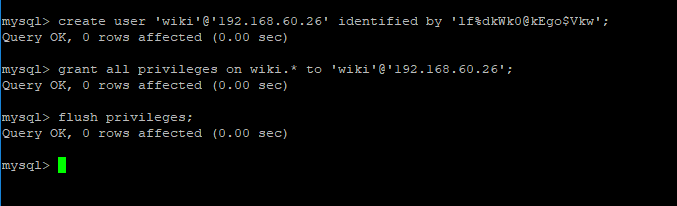
You will need to configure and setup your server and setup databases depending on your needs. Typically you will create users and databases for each application which needs the database. So for our MediaWiki deployment we will want a database called “wiki” and a user called “wiki”. You should also setup a password for the “wiki” user and make sure to remember it for when you setup and configure MediaWiki. My example here is for a remote wiki user at the ip address 192.168.60.26.
Remember, in certain scenarios you will need to create multiple databases, setup replication, create multiple users, and/or perform other database operations. Since this is just a primer, we’ll leave it at this for now.
I’ve worked on some very large (10TB+) tables and instances as well as some with very high throughput. One thing I like to stress to newer people is to never kill the MySQL process. Generally you can recover from doing it, but sometimes you just need to give the server some time to stop and write all changes to disk. It is a painful day when you wreck a multi-terabyte database by being impatient. Even if a database fails to stop with a systemctl stop, it can eventually stop. Let the process flush everything to disk and you’ll almost never have a problem as an administrator.
Backup and Restoration
There are quite a few ways to backup and restore. For a production database my preference is a proprietary solution from Percona, Oracle, or MariaDB, then mysqldump, then filesystem backups in that order. If you have a replica you can run a mysqldump on the replica during off times to get a backup. For place in time recovery you need binlogs enabled and to use the mysqlbinlog utility. Backup and restoration are going to depend on your needs, so that topic may be for a whole other blog post. I’m just ending this post here to stress the importance of backups and restorations. Make sure to always test your backups by restoring them on occasion.